TDD with React Testing Library - component testing
published by mohan
In this blog post I would like to discuss about React Testing Library (RTL) using Test Driven Development (TDD) with some working examples.
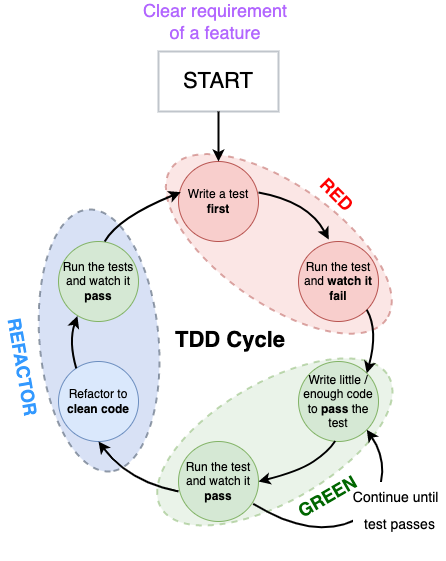
Before we jump into details of the RTL, let’s have a quick overview about TDD. TDD as an approach evolved from Agile manifesto and Extreme programming.
In TDD, the feature development starts off with writing the failing test first. The developer should write less or required amount of code to pass the test. The code should be revised until the test passes. If the test passes then refactor the code to align with the team's development best practices / clean code and make it production ready. The above process has to be repeated throughout the development of the feature, by writing the failing tests first. In the end, we'll have a suite of automated tests which will give more confidence about the feature.
RTL is a light-weight opinionated library used to test react components and it is an alternate solution to Enzyme
The key principle that I like about this library is, it encourages to test the behaviour of the component rather than its internal implementation. As its guiding principle states
The more your tests resemble the way your software is used, the more confidence they can give you.
I couldn’t agree more.
If you’re starting off with create-react-app it ships with React Testing Library out of the box. If you’re are working on stand-alone react projects you can add it to the project using
npm install --save-dev @testing-library/react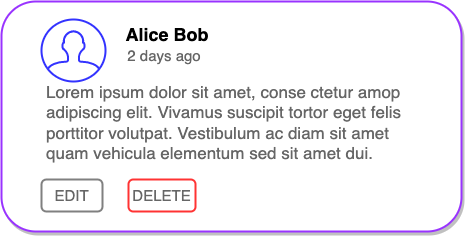
I prefer developing features using bottom-up approach. It helps to compose components one by one and gradually form the complete feature. It also helps to test components in isolation and ensures modularity.

Let's start with our first test that renders Comment component.
In this simple test we're trying to render the Comment component using render() method. As name suggests, it helps to render the component into a container which will be appended to document.body. Let's run our first test and see what happens.
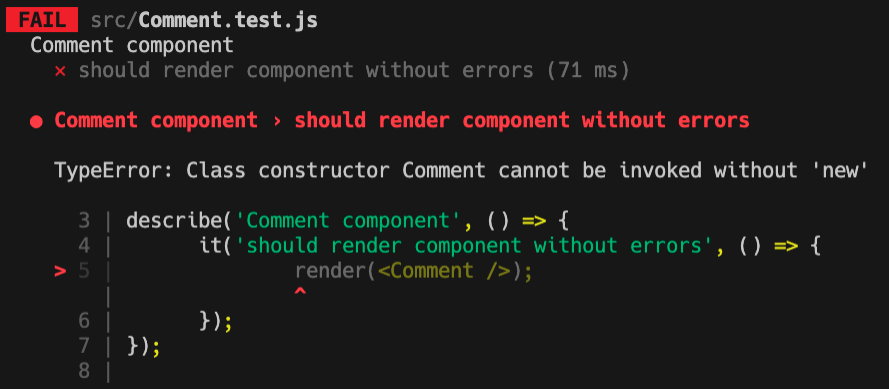
It failed, as we didn't import the Comment component.
Now with this not-yet-there Comment component in place let's import it and run our test again.
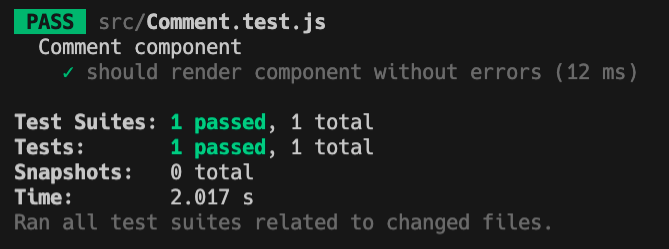
Yaaay, our first test passed, that's a WIN 🙌 . Let us continue with our next test to display all necessary properties of the comment component. Also, we can assume Comment component will get the data props with all details of a comment from API. After setting up mock props, our test will look like this.
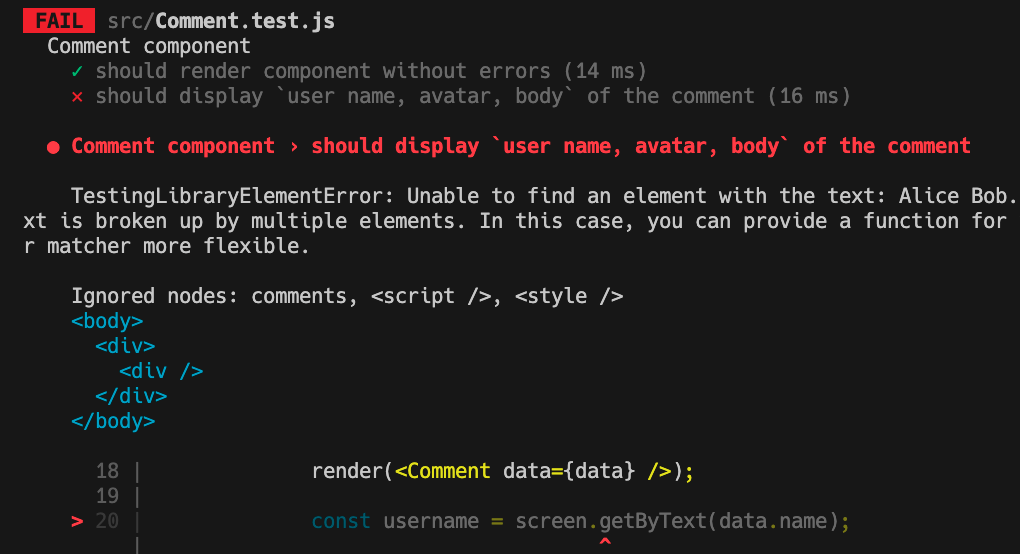
To identity a particular element from the page, RTL provides a set of Queries. More details and types of queries can be found here. In our case we're using getByText() method to match the given string in the document.
Our test failed, since our Comment component doesn't render the comment author name yet. It also points out the exact line where it failed along with detailed explanation.
Let's wire up our Comment component to accept the props from parent component and render the details based on the mock up. In the below code we have setup some containers to apply required styling to match the wireframe and render the user name from the props.
Now let's run our failing test and see what happens.
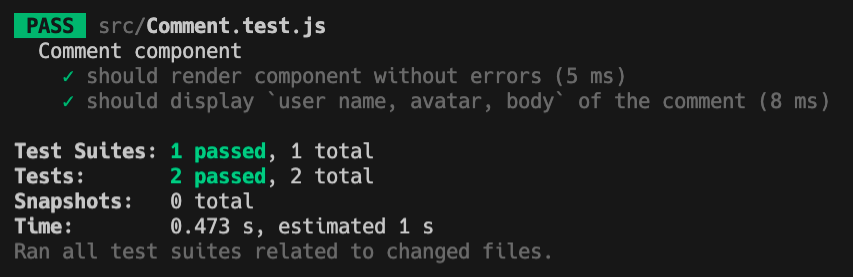
As the query selector getByText() method found the matching text in the page our second test also passed 🥳 . As per the test descriptor we need to test other properties avatar and body. Let's add assertions for those properties and repeat the fail ➡️ pass ➡️ refactor approach. After adding the necessary elements to the component the final code will look something like this to match the wireframe.
I have used react-time-ago npm package to render the comment published time in a user-friendly way. The final test to assert all comment properties will look something like this.
As you can see we can organise our component testing with Arrange Act Assert pattern. The same technique should be applied for CommentActions component too to test the edit and delete actions. Here is the final code for the CommentActions component.
jest.spyOn
The useSession method provides the logged-in user details which is used to check against the comment author for enabling edit and delete buttons. As user session involves user login and dependency with multiple modules, we can intercept the useSession method in our test using Jest spy method. Here is the complete test code for CommentActions component with
jest spy to test our component in isolation.
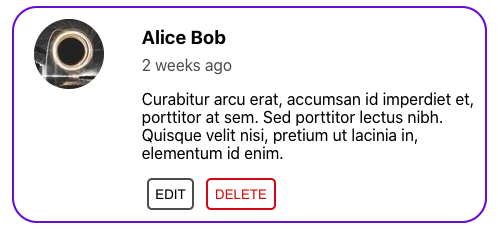
Given our Comment and CommentActions component working, here is the final output.
The next step is to build the parent component Comments that renders all available comments from the API. Here is the final version of the Comments component that uses Promise function to fetch the comments from remote API using blogId.
As the Comments component is the parent which embeds other children components (Comment, CommentActions), we can perform integration testing. This helps to test some of the functional requirements like
- Ensuring
EDITandDELETEoptions available only to own comments - Simulate click events and check the behaviour
- Application state after deleting a comment
- Testing components with
asyncoperations
The final test code for our Comments component:
waitFor
It is used to test async scenarios, and it will wait until the expectation is passed. On line number 11, we're querying user name inside waitFor method and it will await until the query resolves before continuing the execution. More details on waitFor can be found here.
userEvent
Last but not the least. The userEvent method is used to simulate the user interactions with the document. In our user case we simulate the delete operation and ensure the element is removed from the DOM.
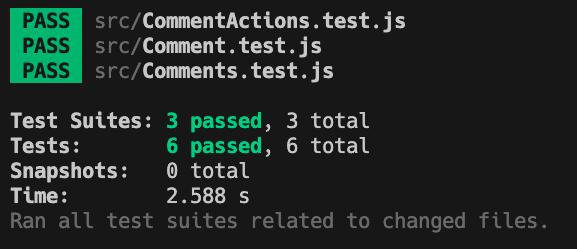
Now we have a test suite that covers individual component tests and integration tests as well. The final test summary shows all of our tests PASS and everything is in GREEN 💚
If you have made this far, then congratulations 🎉 . We have come to an end to the intro blog of React Testing Library with TDD. I hope it was useful, feel free to share your thoughts about this blog in the comment section 😀.
Github link to the completed project - https://github.com/m0hanraj/social-comments
References: